Airbrushing 3 Color Leather Flames
By Jeff mosby
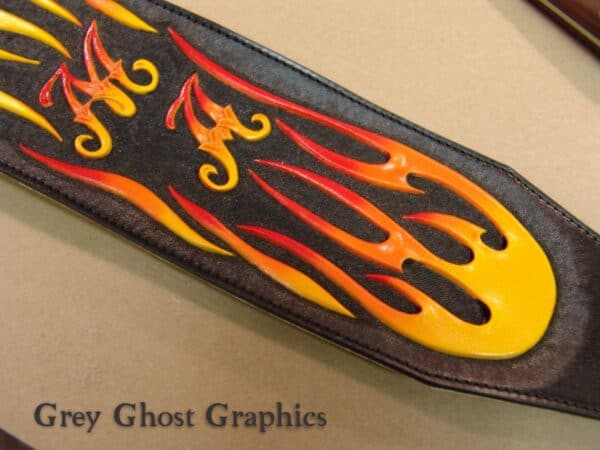
One of the most striking styles of guitar straps that I have been asked to make over the years have been those incorporating airbrushed flames. I do these in several color schemes but most involve 3 colors that compliment each other. The most traditional and common is the yellow-orange-red combination. This has been very popular for decades in the automotive and motorcycle world and is used in many beautiful custom paint jobs. After doing these for several years in leather I have found a method that works very well with consistency from project to project and I wanted to take the opportunity to share this with everyone.
All of my flame straps are carved into regular veg tan leather. I try to make the flames as 3D as possible by carving deeply and lifting interior curves with lifters whenever possible. To complete the picture it is necessary to airbrush the colors onto the flames. Like most endeavors the process can present some challenges that must be overcome with trial and error. One of the first mistakes I made was in doing all of the background dye work (I use Black for all of my flame straps) first. I then airbrushed the flames. Big waste of time because I had to go back over the strap to cover the over spray from the airbrush. Basically I doubled the amount of work I had to do. I now do all of the airbrushing first. I have found that the Fiebings Black Oil Dye does a great job of covering these colors if it is applied after the airbrushing is done. The over spray virtually disappears. This is now the sequence that I use for all flame patterns.
My recipe for the yellow-orange-red pattern is as follows:
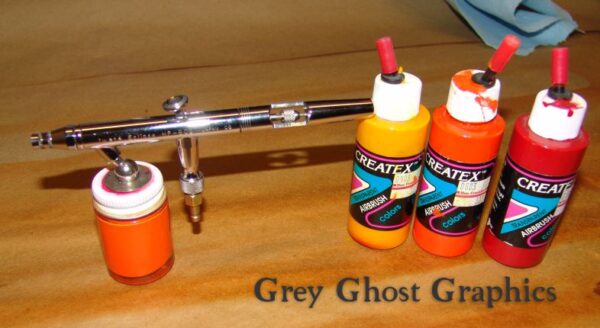
Createx Golden Yellow Airbrush Acrylic
Createx Transparent Orange Airbrush Acrylic
Createx Transparent Red Airbrush Acrylic
My recipe for the blue flame strap is (in the order it is applied) –
Createx Opaque Sky Blue
Createx Transparent Caribbean Blue
Createx Transparent Pthalo Blue
I have found that the transparent colors yield a better fade/transition from color to color on the flames. The Createx paints are ready to spray right out of the bottle so they are easy to use and create a beautiful finish.
The airbrush that I have found works the best for me is the Iwata Eclipse BCS. (See below) It is beautifully made to very tight tolerances and doesn’t seem to have the clogging problems I’ve encountered with a Paasche when spraying acrylics. I use 40 psi when spraying. This produces a very fine atomization and provides a very smooth fade between colors. Make sure to use a good inline filter to keep water and other impurities out of your air supply that could ruin your project!
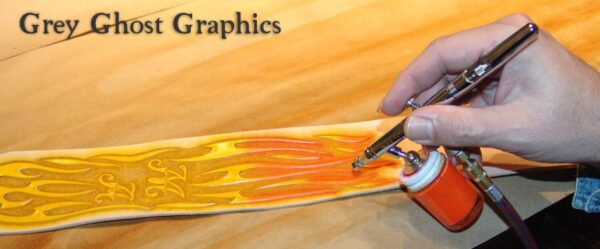
I begin by spraying a good base coat of golden yellow over all of the flames. I make sure to completely cover the flames, even on the sides. I don’t want the natural leather to show through anywhere on the flames. I try to avoid too much overspray onto the checkered background around the flames but it is inevitable that some will occur. Just remember that this will be covered up with the black dye later. It usually takes two coats to get a good solid color. The reason for spraying the first color (I always spray the lightest color first regardless of the color combination) is that the other colors being transparent, will be altered by the natural color of the leather and will not achieve the desired effect. By spraying the base coat over everything I am assured that the next colors will blend well with each other and also not be altered by the tan color of the leather showing through. It is also important to cover the side edges of the flame with the base color because it will be difficult to do so with the orange or red without hitting adjacent flames in the process. As long as the entire flame is covered with the base color and no natural leather is visible you will achieve the results you are after. The photo below shows the flames after being sprayed with the base coat of golden yellow

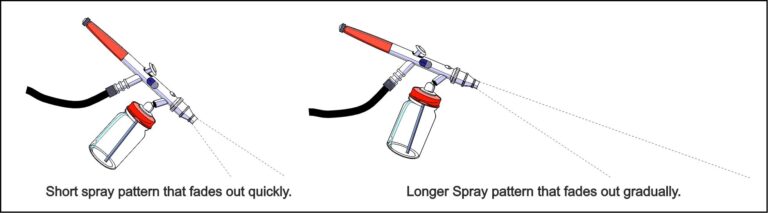
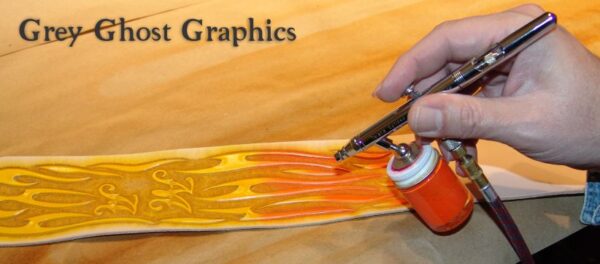
Once the base coat is applied we are ready to apply the second color (transparent orange). A mistake that I made on my first flame strap was by shooting the second color from the base of the flame towards the tip. I never achieved the smooth transition between colors that I was after. It finally dawned on me that I was going about it all wrong and making a lot more work for myself in the process. I now spray from the tip of the flame to the base. I begin with the airbrush aimed down at the flame at about a 30 degree angle. I use a double action airbrush for all of my flame work. I push down on the trigger and slowly pull back on the trigger to bring the paint into the airbrush. I am always careful to practice on scrap to familiarize myself with the feel of the trigger and to see how each color will spray. It can vary a lot so do this often. I spray the tip of the flame fairly close to achieve a fairly dense color. as I progress down the flame I pull up the airbrush slightly and decrease the angle so that the spray pattern is longer. The result is that the intensity of the color decreases the farther away it is from the airbrush nozzle. This automatically give you a very smooth color transition. (See below)
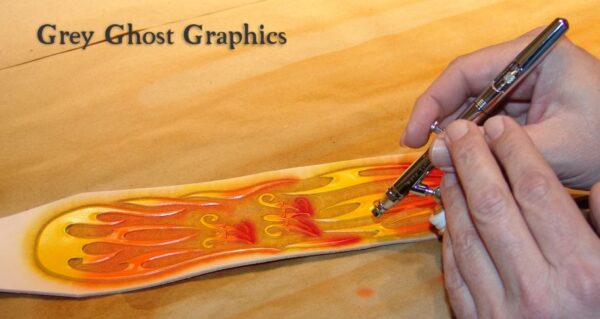
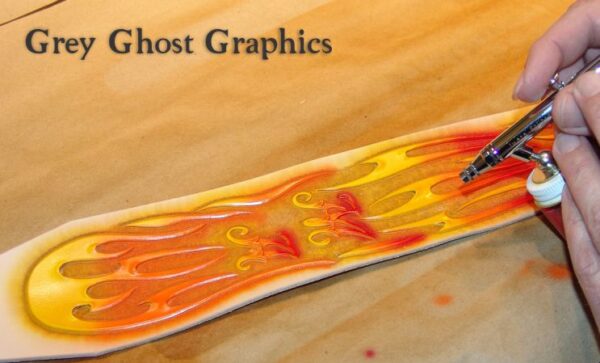
I try to leave the bottom third of the flame untouched to maintain a strong yellow color. I often find it necessary to spray a second coat of orange since it never seems as bright and solid when it dries. You can change the overall look dramatically by leaving more or less of the base coat so feel free to experiment! The third color is sprayed in the same fashion as the second. I try to spray just the tips (the upper third) with the red, applying a second coat of this as well.(See sequence below)
The entire sequence can be seen below:
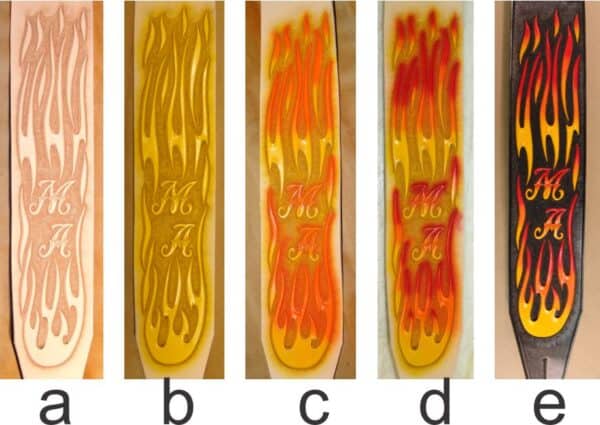
When you are finished with the airbrush clean it immediately! Acrylic paint is difficult to remove once it is dried in the airbrush so make sure to clean the airbrush and color jars thoroughly. The flames will look a bit odd until the black background is completed so don’t let that throw you. Often project will look awful in the intermediate stages. This one is no exception. I use good quality brushes to carefully dye the entire area surround the flames. Be extremely careful to avoid getting any black dye on the flames as it is difficult to cover up. If this happens you can use an opaque acrylic that matches the area to carefully touch it up using a brush. This happened to me on the strap I made for this article. My hand slipped and I hit the side of a flame with the black dye. After a good bit of colorful language I was able to fix the area so that only I would know where it was. I finish dyeing the rest of the strap with a dauber using a poster board shield to protect the flames from the spattering that daubers often produce. Once the dye work is complete the colors in the flames become very vibrant in contrast. If I am doing a blue flame strap the base coat has a lot of white in it which is difficult to cover completely with the dye. In this case I touch up these areas with thinned black acrylic. It eliminates the ghosting that can occur when the light blue shows through the black dye. The stark contrast between the colorful flames and the black background is further enhanced. The end result is a very beautiful 3 dimensional flame effect that your customer will love.